Chapitre 12. Running Virtual Machines with qemu-kvm
Table des matières
Once you have a virtual disk image ready (for more information on disk images, see Section 11.2, « Managing Disk Images with qemu-img »), it is time to start the related virtual machine. Section 11.1, « Basic Installation with qemu-kvm » introduced simple commands to install and run a VM Guest. This chapter focuses on a more detailed explanation of qemu-kvm usage, and shows solutions of more specific tasks. For a complete list of qemu-kvm's options, see its manual page (man 1 qemu-kvm).
12.1. Basic qemu-kvm Invocation
The qemu-kvm command uses the following syntax:
qemu-kvm optionsdisk_img
| qemu-kvm understands a large number of options. Most of them define parameters of the emulated hardware, while others affect more general emulator behavior. If you do not supply any options, default values are used, and you need to supply the path to a disk image to be run. |
|
Path to the disk image holding the guest system you want to virtualize.
qemu-kvm supports a large number of image formats.
Use qemu-img --help to list them. If you do not
supply the path to a disk image as a separate argument, you have to use
the |
12.2. General qemu-kvm Options
This section introduces general qemu-kvm options and options related to the basic emulated hardware, such as virtual machine's processor, memory, model type, or time processing methods.
-namename_of_guestSpecifies the name of the running guest system. The name is displayed in the window caption and also used for the VNC server.
-bootoptionsSpecifies the order in which the defined drives will be booted. Drives are represented by letters, where 'a' and 'b' stands for the floppy drives 1 and 2, 'c' stands for the first hard disk, 'd' stands for the first CD-ROM drive, and 'n' to 'p' stand for Ether-boot network adapters.
For example,
qemu-kvm [...] -boot order=ndcfirst tries to boot from network, then from the first CD-ROM drive, and finally from the first hard disk.-pidfilefnameStores the QEMU's process identification number (PID) in a file. This is useful if you run QEMU from a script.
-nodefaultsBy default QEMU creates basic virtual devices even if you do not specify them on the command line. This option turns this feature off, and you must specify every single device manually, including graphical and network cards, parallel or serial ports, or virtual consoles. Even QEMU monitor is not attached by default.
-daemonize'Daemonizes' the QEMU process after it is started. QEMU will detach from the standard input and standard output after it is ready to receive connections on any of its devices.
12.2.1. Basic Virtual Hardware
-Mmachine_typeSpecifies the type of the emulated machine. Run qemu-kvm -M ? to view a list of supported machine types.
tux@venus:~> qemu-kvm -M ?
Supported machines are:
pc         Standard PC (alias of pc-0.12)
pc-0.12    Standard PC (default)
pc-0.11    Standard PC, qemu 0.11
pc-0.10    Standard PC, qemu 0.10
isapc      ISA-only PC
![[Note]](style_images/note.png)
Currently, SUSE supports only
pc-0.12andpc-0.14machine types.-mmegabytesSpecifies how many megabytes are used for the virtual RAM size. Default is 512 MB.
-balloon virtioSpecifies a paravirtualized device to dynamically change the amount of virtual RAM memory assigned to VM Guest. The top limit is the amount of memory specified with
-m.-cpucpu_modelSpecifies the type of the processor (CPU) model. Run qemu-kvm -cpu ? to view a list of supported CPU models.
tux@venus:~> qemu-kvm -cpu ?
x86           qemu64
x86           phenom
x86         core2duo
x86            kvm64
x86           qemu32
x86          coreduo
x86              486
x86          pentium
x86         pentium2
x86         pentium3
x86           athlon
x86             n270
-smpnumber_of_cpusSpecifies how many CPUs will be emulated. QEMU supports up to 255 CPUs on the PC platform (up to 64 with KVM acceleration used). This option also takes other CPU-related parameters, such as number of sockets, number of cores per socket, or number of threads per core.
Following is an example of a working qemu-kvm command line:
qemu-kvm -name "SLES 11 SP1" -M pc-0.12 -m 512 -cpu kvm64 \
-smp 2 /images/sles11sp1.raw
-no-acpiDisables ACPI support. Try to use it if VM Guest reports problems with ACPI interface.
-SQEMU starts with CPU stopped. To start CPU, enter
cin QEMU monitor. For more information, see Chapitre 13, Administrating Virtual Machines with QEMU Monitor.
12.2.2. Storing and Reading Configuration of Virtual Devices
-readconfigcfg_fileInstead of entering the devices configuration options on the command line each time you want to run VM Guest, qemu-kvm can read it from a file which was either previously saved with
-writeconfigor edited manually.-writeconfigcfg_fileDumps the current virtual machine devices configuration to a text file. It can be consequently re-used with the
-readconfigoption.tux@venus:~> qemu-kvm -name "SLES 11 SP1" -M pc-0.12 -m 512 -cpu kvm64 \ -smp 2 /images/sles11sp1.raw -writeconfig /images/sles11sp1.cfg (exited) tux@venus:~> more /images/sles11sp1.cfg # qemu config file [drive] index = "0" media = "disk" file = "/images/sles11sp1_base.raw"
This way you can effectively manage the configuration of your virtual machines' devices in a well-arranged way.
12.2.3. Guest Real-time Clock
-rtcoptionsSpecifies the way the RTC is handled inside a VM Guest. By default, the clock of the guest is derived from that of the host system. Therefore, it is recommended that the host system clock is synchronized with an accurate external clock (for example, via NTP service).
If you need to isolate the VM Guest clock from the host one, specify
clock=vminstead of the defaultclock=host.You can also specify a 'starting point' for VM Guest clock with the
baseoption:qemu-kvm [...] -rtc clock=vm,base=2010-12-03T01:02:00
Instead of a timestamp, you can specify
utcorlocaltime. The former instructs VM Guest to start at the current UTC value (Coordinated Universal Time, see http://en.wikipedia.org/wiki/UTC), while the latter applies the local time setting.
12.3. Using Devices in QEMU
QEMU virtual machines emulate all devices needed to run a VM Guest. QEMU supports, for example, several types of network cards, block devices (hard and removable drives), USB devices, character devices (serial and parallel ports), or multimedia devices (graphic and sound cards). For satisfactory operation and performance of the virtual machine, some or all of these devices must be configured correctly. This section introduces options to configure various types of supported devices.
12.3.1. Block Devices
Block devices are vital for virtual machines. In general, these are fixed or removable storage media usually referred to as 'drives'. One of the connected hard drives typically holds the guest operating system to be virtualized.
Virtual machine drives are defined with -drive. This
option uses many suboptions, some of which are described in this
section. For their complete list, see the manual page (man 1
qemu-kvm).
Sub-options for the -drive Option
file=image_fnameSpecifies the path to the disk image which will be used with this drive. If not specified, an empty (removable) drive is assumed.
if=drive_interfaceSpecifies the type of interface to which the drive is connected. Currently only
floppy,ide, orvirtioare supported by SUSE.virtiodefines a paravirtualized disk driver. Default iside.index=index_of_connectorSpecifies the index number of a connector on the disk interface (see the
ifoption) where the drive is connected. If not specified, the index is automatically incremented.media=typeSpecifies the type of the media. Can be
diskfor hard disks, orcdromfor removable CD-ROM drives.format=img_fmtSpecifies the format of the connected disk image. If not specified, the format is autodetected. Currently, SUSE supports
qcow2,qedandrawformats.cache=methodSpecifies the caching method for the drive. Possible values are
unsafe,writethrough,writeback, ornone. For theqcow2image format, choosewritebackif you care about performance.nonedisables the host page cache and, therefore, is the safest option. Default iswritethrough.
![[Tip]](style_images/tip.png) | |
To simplify defining of block devices, QEMU understands several
shortcuts which you may find handy when entering the
You can use qemu-kvm -cdrom /images/cdrom.iso instead of qemu-kvm -drive file=/images/cdrom.iso,index=2,media=cdrom and qemu-kvm -hda /images/imagei1.raw -hdb /images/image2.raw -hdc \ /images/image3.raw -hdd /images/image4.raw instead of qemu-kvm -drive file=/images/image1.raw,index=0,media=disk \ -drive file=/images/image2.raw,index=1,media=disk \ -drive file=/images/image3.raw,index=2,media=disk \ -drive file=/images/image4.raw,index=3,media=disk | |
| Using Host Drives Instead of Images |
|---|---|
Normally you will use disk images (see Section 11.2, « Managing Disk Images with qemu-img ») as disk drives of the virtual machine. However, you can also use existing VM Host Server disks, connect them as drives, and access them from VM Guest. Use the host disk device directly instead of disk image filenames. To access the host CD-ROM drive, use qemu-kvm [...] -drive file=/dev/cdrom,media=cdrom To access the host hard disk, use qemu-kvm [...] -drive file=/dev/hdb,media=disk When accessing the host hard drive from VM Guest, always make sure the access is read-only. You can do so by modifying the host device permissions. | |
12.3.2. Graphic Devices and Display Options
This section describes QEMU options affecting the type of the emulated video card and the way VM Guest graphical output is displayed.
12.3.2.1. Defining Video Cards
QEMU uses -vga to define a video card used to
display VM Guest graphical output. The -vga option
understands the following values:
noneDisables video cards on VM Guest (no video card is emulated). You can still access the running VM Guest via the QEMU monitor and the serial console.
stdEmulates a standard VESA 2.0 VBE video card. Use it if you intend to use high display resolution on VM Guest.
cirrusEmulates Cirrus Logic GD5446 video card. Good choice if you insist on high compatibility of the emulated video hardware. Most operating systems (even Windows 95) recognize this type of card.
For best video performance with the
cirrustype, use 16-bit color depth both on VM Guest and VM Host Server.
12.3.2.2. Display Options
The following options affect the way VM Guest graphical output is displayed.
-nographicDisables QEMU's graphical output. The emulated serial port is redirected to the console.
After starting the virtual machine with
-nographic, press Ctrl+A H in the virtual console to view the list of other useful shortcuts, for example, to toggle between the console and the QEMU monitor.tux@venus:~> qemu-kvm -hda /images/sles11sp1_base.raw -nographic C-a h print this help C-a x exit emulator C-a s save disk data back to file (if -snapshot) C-a t toggle console timestamps C-a b send break (magic sysrq) C-a c switch between console and monitor C-a C-a sends C-a (pressed C-a c) QEMU 0.12.5 monitor - type 'help' for more information (qemu)
-no-frameDisables decorations for the QEMU window. Convenient for dedicated desktop workspace.
-full-screenStarts QEMU graphical output in full screen mode.
-no-quitDisables the 'close' button of QEMU window and prevents it from being closed by force.
-alt-grab, -ctrl-grabBy default QEMU window releases the 'captured' mouse after Ctrl+Alt is pressed. You can change the key combination to either Ctrl+Alt+Shift (
-alt-grab), or Right Ctrl (-ctrl-grab).
12.3.3. USB Devices
There are basically two ways to create USB devices usable by the
VM Guest in KVM: you can either emulate new USB devices inside a
VM Guest, or assign an existing host USB device to a VM Guest. To use
USB devices in QEMU you first need to enable the generic USB driver
with the -usb option. Then you can specify individual
devices with the -usbdevice option.
12.3.3.1. Emulating USB Devices in VM Guest
Although QEMU supports much more types of USB devices, SUSE
currently only supports the types mouse and
tablet.
Types of USB devices for the -usbdevice Option
mouseEmulates a virtual USB mouse. This option overrides the default PS/2 mouse emulation. The following example shows the hardware status of a mouse on VM Guest started with
qemu-kvm [...] -usbdevice mouse:tux@venus:~> hwinfo --mouse 20: USB 00.0: 10503 USB Mouse [Created at usb.122] UDI: /org/freedesktop/Hal/devices/usb_device_627_1_1_if0 [...] Hardware Class: mouse Model: "Adomax QEMU USB Mouse" Hotplug: USB Vendor: usb 0x0627 "Adomax Technology Co., Ltd" Device: usb 0x0001 "QEMU USB Mouse" [...]
tabletEmulates a pointer device that uses absolute coordinates (such as touchscreen). This option overrides the default PS/2 mouse emulation. The tablet device is useful if you are viewing VM Guest via the VNC protocol. See Section 12.5, « Viewing a VM Guest with VNC » for more information.
12.3.3.2. USB Pass-Through
To assign an existing host USB device to a VM Guest, you need to find out its host bus and device ID.
tux@vmhost:~> lsusb
[...]
Bus 002 Device 005: ID 12d1:1406 Huawei Technologies Co., Ltd. E1750
[...]
In the above example, we want to assign a USB stick connected to the host's USB bus number 2 with device number 5. Now run the VM Guest with the following additional options:
qemu-kvm [...] -usb -device usb-host,hostbus=2,hostaddr=5
After the guest is booted, check that the assigned USB device is present on it.
tux@vmguest:~> lsusb
[...]
Bus 001 Device 002: ID 12d1:1406 Huawei Technologies Co., Ltd. E1750
[...]
| |
The guest operating system must take care of mounting the assigned USB device so that it is accessible for the user. | |
12.3.4. PCI Pass-Through
PCI Pass-Through is a technique to give your VM Guest exclusive access to a PCI device.
| |
To make use of PCI Pass-Through, your motherboard chipset, BIOS, and CPU must have support for AMD's IOMMU (or VT-d in Intel speak) virtualization technology. To make sure that your computer supports this feature, ask your supplier specifically to deliver a system that supports PCI Pass-Through. | |
| |
Assignment of graphics cards is not supported by SUSE. | |
Procédure 12.1. Configuring PCI Pass-Through
Make sure that
CONFIG_DMAR_DEFAULT_ONis set in the host's running Kernel:grep CONFIG_DMAR_DEFAULT_ON /boot/config-`uname -r`
If this option is not set, edit your boot loader configuration and add
intel_iommu=on(Intel machines) oriommu=pt iommu=1(AMD machines). Then reboot the host machine.Check that IOMMU is actively enabled and recognized on the host. Run dmesg | grep -e DMAR -e IOMMU on Intel machines, or dmesg | grep AMD-Vi on AMD machines. If you get no output, check carefully if your hardware supports IOMMU (VT-d) and check that it has been enabled in BIOS.
Identify the host PCI device to assign to the guest.
tux@vmhost:~> lspci -nn
[...] 00:1b.0 Audio device [0403]: Intel Corporation 82801H (ICH8 Family) \
HD Audio Controller [8086:284b] (rev 02) [...]
Note down the device (
00:1b.0) and vendor (8086:284b) ID.Unbind the device from host Kernel driver and bind it to the PCI stub driver.
tux@vmhost:~> modprobe pci_stub
tux@vmhost:~> echo "8086 284b" > /sys/bus/pci/drivers/pci-stub/new_id
tux@vmhost:~> echo "0000:00:1b.0" > /sys/bus/pci/devices/0000:00:1b.0/driver/unbind
tux@vmhost:~> echo "0000:00:1b.0" > /sys/bus/pci/drivers/pci-stub/bind
Now run the VM Guest with the PCI device assigned.
qemu-kvm [...] -device pci-assign,host=00:1b.0
| |
If the PCI device shares IRQ with other devices, it cannot be assigned to a VM Guest. | |
KVM also supports PCI device hotplugging to a VM Guest. To achieve this, you need to switch to a QEMU monitor (see Chapitre 13, Administrating Virtual Machines with QEMU Monitor for more information) and issue the following commands:
hot add:
device_add pci-assign,host=00:1b.0,id=new_pci_device
hot remove:
device_del new_pci_device
12.3.5. Character Devices
Use -chardev to create a new character device. The
option uses the following general syntax:
qemu-kvm [...] -chardevbackend_type,id=id_string
where backend_type can be one of
null, socket,
udp, msmouse,
vc, file, pipe,
console, serial,
pty, stdio,
braille, tty, or
parport. All character devices must have a unique
identification string up to 127 characters long. It is used to identify
the device in other related directives. For the complete description of
all backend's suboptions, see the manual page (man 1
qemu-kvm). A brief description of the available
backends follows:
nullCreates an empty device which outputs no data and drops any data it receives.
stdioConnects to QEMU's process standard input and standard output.
socketCreates a two-way stream socket. If
pathis specified, a Unix socket is created:qemu-kvm [...] -chardev \ socket,id=unix_socket1,path=/tmp/unix_socket1,server
The
serversuboption specifies that the socket is a listening socket.If
portis specified, a TCP socket is created:qemu-kvm [...] -chardev \ socket,id=tcp_socket1,host=localhost,port=7777,server,nowait
The command creates a local listening (
server) TCP socket on port 7777. QEMU will not block waiting for a client to connect to the listening port (nowait).udpSends all network traffic from VM Guest to a remote host over the UDP protocol.
qemu-kvm [...] -chardev udp,id=udp_fwd,host=mercury.example.com,port=7777
The command binds port 7777 on the remote host mercury.example.com and sends VM Guest network traffic there.
vcCreates a new QEMU text console. You can optionally specify the dimensions of the virtual console:
qemu-kvm [...] -chardev vc,id=vc1,width=640,height=480 -mon chardev=vc1
The command creates a new virtual console called
vc1of the specified size, and connects the QEMU monitor to it.fileLogs all traffic from VM Guest to a file on VM Host Server. The
pathis required and will be created if it does not exist.qemu-kvm [...] -chardev file,id=qemu_log1,path=/var/log/qemu/guest1.log
By default QEMU creates a set of character devices for serial and parallel ports, and a special console for QEMU monitor. You can, however, create your own character devices and use them for just mentioned purposes. The following options will help you:
-serialchar_devRedirects the VM Guest's virtual serial port to a character device
char_devon VM Host Server. By default, it is a virtual console (vc) in graphical mode, andstdioin non-graphical mode. The-serialunderstands many suboptions. See the manual page man 1 qemu-kvm for their complete list.You can emulate up to 4 serial ports. Use
-serial
       none
to disable all serial ports.-paralleldeviceRedirects the VM Guest's parallel port to a
device. This option supports the same devices as-serial.With openSUSE or SUSE Linux Enterprise Server as a VM Host Server, you can directly use the hardware parallel port devices
/dev/parportNwhereNis the number of the port.You can emulate up to 3 parallel ports. Use
-parallel
       none
to disable all parallel ports.-monitorchar_devRedirects the QEMU monitor to a character device
char_devon VM Host Server. This option supports the same devices as-serial. By default, it is a virtual console (vc) in a graphical mode, andstdioin non-graphical mode.
12.4. Networking in QEMU
Use the -net option to define a network interface and
a specific type of networking for your VM Guest. Currently, SUSE
supports the following options: none,
nic, user, and
tap. For a complete list of -net
suboptions, see the manual page (man 1 qemu-kvm).
Supported -net Suboptions
noneDisables a network card emulation on VM Guest. Only the loopback
lonetwork interface is available.nicCreates a new Network Interface Card (NIC) and connects it to a specified Virtual Local Area Network (VLAN). For more information, see Section 12.4.1, « Defining a Network Interface Card »
userSpecifies a user-mode networking. For more information , see Section 12.4.2, « User-mode Networking ».
tapSpecifies a bridged or routed networking. For more information, see Section 12.4.3, « Bridged Networking ».
12.4.1. Defining a Network Interface Card
Use -net nic to add a new emulated network card:
qemu-kvm [...] -net nic,vlan=1,\ model=virtio
,name=ncard1
| Connects the network interface to VLAN number 1. You can specify your own number, it is mainly useful for identification purpose. If you omit this suboption, QEMU uses the default 0. |
| Specifies the Media Access Control (MAC) address for the network card. It is a unique identifier and you are advised to always specify it. If not, QEMU supplies its own default MAC address and creates a possible MAC address conflict within the related VLAN. |
|
Specifies the model of the network card. Use
Currently, SUSE supports the models |
12.4.2. User-mode Networking
The -net user option instructs QEMU to use a
user-mode networking. This is the default if no networking mode is
selected. Therefore, these command lines are equivalent:
qemu-kvm -hda /images/sles11sp1_base.raw
qemu-kvm -hda /images/sles11sp1_base.raw -net nic -net user
This mode is useful if you want to allow the VM Guest to access the external network resources, such as Internet. By default, no incoming traffic is permitted and therefore, the VM Guest is not visible to other machines on the network. No administrator privileges are required in this networking mode. The user-mode is also useful to do a 'network-booting' on your VM Guest from a local directory on VM Host Server.
The VM Guest allocates an IP address from a virtual DHCP server. VM Host Server (the DHCP server) is reachable at 10.0.2.2, while the IP address range for allocation starts from 10.0.2.15. You can use ssh to connect to VM Host Server at 10.0.2.2, and scp to copy files back and forth.
12.4.2.1. Command Line Examples
This section shows several examples on how to set up user-mode networking with QEMU.
Exemple 12.1. Restricted User-mode Networking
qemu-kvm [...] -net user
| Specifies user-mode networking. |
| Connect to VLAN number 1. If omitted, defaults to 0. |
| Specifies a human readable name of the network stack. Useful when identifying it in the QEMU monitor. |
| Isolates VM Guest. It will not be able to communicate with VM Host Server and no network packets will be routed to the external network. |
Exemple 12.2. User-mode Networking with Custom IP Range
qemu-kvm [...] -net user,net=10.2.0.0/8
| Specifies the IP address of the network that VM Guest sees and optionally the netmask. Default is 10.0.2.0/8. |
| Specifies the VM Host Server IP address that VM Guest sees. Default is 10.0.2.2. |
| Specifies the first of the 16 IP addresses that the built-in DHCP server can assign to VM Guest. Default is 10.0.2.15. |
| Specifies the hostname that the built-in DHCP server will assign to VM Guest. |
Exemple 12.3. User-mode Networking with Network-boot and TFTP
qemu-kvm [...] -net user,tftp=/images/tftp_dir
| Activates a built-in TFTP (a file transfer protocol with the functionality of a very basic FTP) server. The files in the specified directory will be visible to a VM Guest as the root of a TFTP server. |
|
Broadcasts the specified file as a BOOTP (a network protocol which
offers an IP address and a network location of a boot image, often
used in diskless workstations) file. When used together with
|
Exemple 12.4. User-mode Networking with Host Port Forwarding
qemu-kvm [...] -net user,hostfwd=tcp::2222-:22
Forwards incoming TCP connections to the port 2222 on the host to the
port 22 (SSH) on VM Guest.
If sshd is running on
VM Guest, enter
ssh qemu_host -p 2222
where qemu_host is the hostname or IP address of
the host system, to get a SSH
prompt from VM Guest.
12.4.3. Bridged Networking
With the -net tap option, QEMU creates a network
bridge by connecting the host TAP network device to a specified VLAN of
VM Guest. Its network interface is then visible to the rest of the
network. This method does not work by default and has to be explicitly
specified.
First, create a network bridge and add a VM Host Server physical network
interface (usually eth0) to it:
Start YaST Control Center and select +.
Click and select from the drop-down list in the window. Click .
Choose whether you need a dynamically or statically assigned IP address, and fill the related network settings if applicable.
In the pane, select the Ethernet device to add to the bridge.
Click . When asked about adapting an already configured device, click .
Click to apply the changes. Check if the bridge is created:
tux@venus:~> brctl show
bridge name bridge id          STP enabled  interfaces
br0         8000.001676d670e4  no           eth0

Use the following example script to connect VM Guest to the newly
created bridge interface br0. Several commands in the
script are run via the sudo mechanism because they
require root privileges.
| |
Make sure the | |
#!/bin/bash bridge=br0sudo brctl addif $bridge $tap
qemu-kvm -m 512 -hda /images/sles11sp1_base.raw \ -net nic,vlan=0,model=virtio,macaddr=00:16:35:AF:94:4B \ -net tap,vlan=0,ifname=$tap
,script=no
,downscript=no sudo brctl delif $bridge $tap
sudo ip link set $tap down
sudo tunctl -d $tap

| Name of the bridge device. |
| Prepare a new TAP device and assign it to the user who runs the script. TAP devices are virtual network devices often used for virtualization and emulation setups. |
| Bring up the newly created TAP network interface. |
| Make a 1 second pause to make sure the new TAP network interface is really up. |
|
Add the new |
|
The |
|
Before qemu-kvm connects to a network bridge, it
checks the |
|
Deletes the TAP interface from a network bridge
|
| Sets the state of the TAP device to 'down'. |
| Deconfigures the TAP device. |
12.4.4. Accelerated Networking with vhost-net
The vhost-net module is used to accelerate
KVM's paravirtualized network drivers. It provides better latency and
greater throughput for network.
To make use of the module, verify that the host's running Kernel has
CONFIG_VHOST_NET turned on or enabled as a module:
grep CONFIG_VHOST_NET /boot/config-`uname -r`
Also verify that the guest's running Kernel has
CONFIG_PCI_MSI enabled:
grep CONFIG_PCI_MSI /boot/config-`uname -r`
If both conditions are met, use the vhost-net driver
by starting the guest with the following example command line:
qemu-kvm [...] -netdev tap,id=guest0,vhost=on,script=no
-net nic,model=virtio,netdev=guest0,macaddr=00:16:35:AF:94:4B
Note that guest0 is an identification string of the
vhost-driven device.
12.5. Viewing a VM Guest with VNC
QEMU normally uses an SDL (a cross-platform multimedia library) window
to display the graphical output of a VM Guest. With the
-vnc option specified, you can make QEMU listen on a
specified VNC display and redirect its graphical output to the VNC
session.
| |
When working with QEMU's virtual machine via VNC session, it is useful
to work with the
Moreover, if you need to use another keyboard layout than the default
| |
The first suboption of -vnc must be a
display value. The -vnc option
understands the following display specifications:
host:displayOnly connections from
hoston the display numberdisplaywill be accepted. The TCP port on which the VNC session is then running is normally a 5900 +displaynumber. If you do not specifyhost, connections will be accepted from any host.unix:pathThe VNC server listens for connections on Unix domain sockets. The
pathoption specifies the location of the related Unix socket.noneThe VNC server functionality is initialized, but the server itself is not started. You can start the VNC server later with the QEMU monitor. For more information, see Chapitre 13, Administrating Virtual Machines with QEMU Monitor.
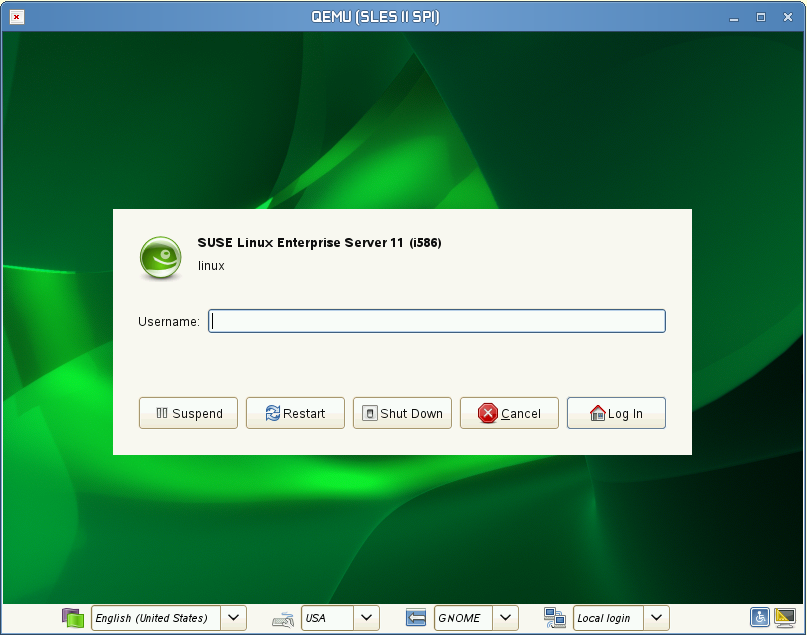
tux@venus:~> qemu-kvm [...] -vnc :5
(on the client:)
wilber@jupiter:~> vinagre venus:5905 &

12.5.1. Secure VNC Connections
The default VNC server setup does not use any form of authentication. In the previous example, any user can connect and view the QEMU VNC Session from any host on the network.
There are several levels of security which you can apply to your VNC client/server connection. You can either protect your connection with a password, use x509 certificates, use SASL authentication, or even combine some of these authentication methods in one QEMU command.
See Section A.2, « Generating x509 Client/Server Certificates » for more information about
the x509 certificates generation. For more information about configuring
x509 certificates on a VM Host Server and the client, see
Section 6.2.2, « Remote TLS/SSL Connection with x509 Certificate (qemu+tls) » and
Section 6.2.2.3, « Configuring the Client and Testing the Setup ».
The Vinagre VNC viewer supports advanced authentication mechanisms.
Therefore, it will be used to view the graphical output of VM Guest in
the following examples. For this example, let us assume that the server
x509 certificates ca-cert.pem,
server-cert.pem, and
server-key.pem are located in the
/etc/pki/qemu directory on the host, while the
client's certificates are distributed in the following locations on the
client:
/etc/pki/CA/cacert.pem
|
/etc/pki/libvirt-vnc/clientcert.pem
|
/etc/pki/libvirt-vnc/private/clientkey.pem
|
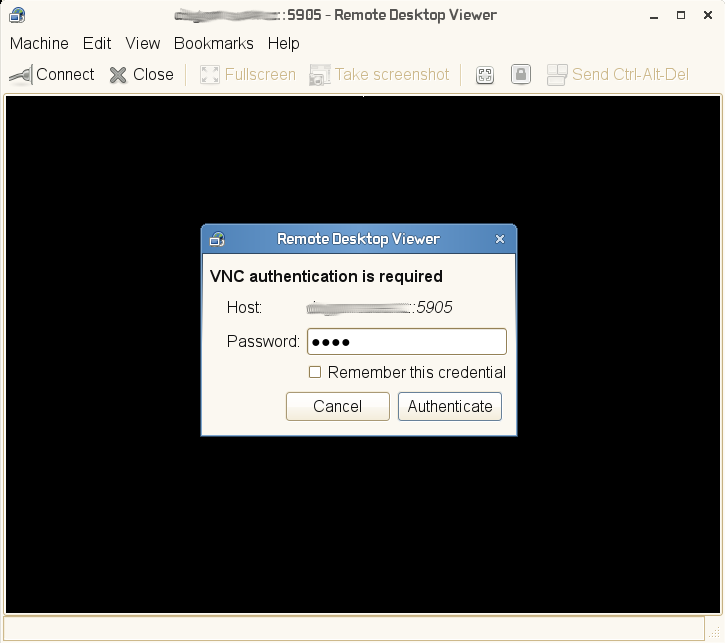
Exemple 12.5. Password Authentication
qemu-kvm [...] -vnc :5,password -monitor stdio
Starts the VM Guest graphical output on VNC display number 5 (usually
port 5905). The password suboption initializes a
simple password-based authentication method. There is no password set
by default and you have to set one with the change vnc
password command in QEMU monitor:
QEMU 0.12.5 monitor - type 'help' for more information
(qemu) change vnc password
Password: ****
You need the -monitor stdio option here, because you
would not be able to manage the QEMU monitor without redirecting its
input/output.
Exemple 12.6. x509 Certificate Authentication
The QEMU VNC server can use TLS encryption for the session and x509 certificates for authentication. The server asks the client for a certificate and validates it against the CA certificate. Use this authentication type if your company provides an internal certificate authority.
qemu-kvm [...] -vnc :5,tls,x509verify=/etc/pki/qemu
Exemple 12.7. x509 Certificate and Password Authentication
You can combine the password authentication with TLS encryption and x509 certificate authentication to create a two-layer authentication model for clients. Remember to set the password in the QEMU monitor after you run the following command:
qemu-kvm [...] -vnc :5,password,tls,x509verify=/etc/pki/qemu -monitor stdio
Exemple 12.8. SASL Authentication
Simple Authentication and Security Layer (SASL) is a framework for authentication and data security in Internet protocols. It integrates several authentication mechanisms, like PAM, Kerberos, LDAP and more. SASL keeps its own user database, so the connecting user accounts do not need to exist on VM Host Server.
For security reasons, you are advised to combine SASL authentication with TLS encryption and x509 certificates:
qemu-kvm [...] -vnc :5,tls,x509,sasl -monitor stdio
12.6. VirtFS: Sharing Folders between Host and Guests
VM Guests usually run in a separate computing space — they are provided their own memory range, dedicated CPUs, and filesystem space. Ability to share parts of VM Host Server's filesystem makes the virtualization environment more flexible by simplifying mutual data exchange. Network filesystems, such as CIFS and NFS, have been the traditional way of sharing folders. But as they are not specifically designed for virtualization purposes, they suffer from major performance and feature issues.
KVM introduces a new and more optimized tool called VirtFS (sometimes referred to as a « filesystem pass-through »). VirtFS uses a paravirtual filesystem driver, which avoids converting the guest application filesystem operations into block device operations, and then again into host filesystem operations. VirtFS uses Plan-9 network protocol for communication between the guest and the host.
You can typically use VirtFS to
access a shared folder from several guests, or to provide guest-to-guest filesystem access.
replace the virtual disk as the root filesystem to which the guest's ramdisk connects to during the guest boot process
provide storage services to different customers from a single host filesystem in a cloud environment
12.6.1. Implementation
In QEMU, the implementation of VirtFS is facilitated by defining two types of devices:
virtio-9p-pcidevice which transports protocol messages and data between the host and the guest.fsdevdevice which defines the export filesystem properties, such as filesystem type and security model.
Exemple 12.9. Exporting Host's Filesystem with VirtFS
qemu-kvm [...] -fsdev local,id=exp1
| Identification of the filesystem to be exported. |
| Filesystem path on the host to be exported. |
|
Security model to be used — |
|
The exported filesystem ID defined before with |
| Mount tag used later on the guest to mount the exported filesystem. |
Such an exported filesystem can be mounted on the guest like this
mount -t 9p -o trans=virtio v_tmp /mnt
where v_tmp is the mount tag defined earlier with
-device mount_tag= and /mnt is
the mount point where you want to mount the exported filesystem.
12.7. KSM: Sharing Memory Pages between Guests
Kernel SamePage Merging (KSM) is a Linux Kernel feature which merges identical memory pages from multiple running processes into one memory region. Because KVM guests run as processes under Linux, KSM provides the memory overcommit feature to hypervisors for more efficient use of memory. Therefore, if you need to run multiple virtual machines on a host with limited memory, KSM is the best solution for you.
To make use of KSM, do the following.
Verify that KSM is enabled in your running Kernel:
grep KSM /boot/config-`uname -r`
CONFIG_KSM=y
If KSM is enabled in the running Kernel, you will see the following files under the
/sys/kernel/mm/ksmdirectory:ls -l /sys/kernel/mm/ksm total 0 drwxr-xr-x 2 root root 0 Nov 9 07:10 ./ drwxr-xr-x 6 root root 0 Nov 9 07:10 ../ -r--r--r-- 1 root root 4096 Nov 9 07:10 full_scans -r--r--r-- 1 root root 4096 Nov 9 07:10 pages_shared -r--r--r-- 1 root root 4096 Nov 9 07:10 pages_sharing -rw-r--r-- 1 root root 4096 Nov 9 07:10 pages_to_scan -r--r--r-- 1 root root 4096 Nov 9 07:10 pages_unshared -r--r--r-- 1 root root 4096 Nov 9 07:10 pages_volatile -rw-r--r-- 1 root root 4096 Nov 9 07:10 run -rw-r--r-- 1 root root 4096 Nov 9 07:10 sleep_millisecs
Check if KSM feature is turned on.
cat /sys/kernel/mm/ksm/run
If the command returns
0, turn KSM on withecho 1 > /sys/kernel/mm/ksm/run
Now run several VM Guests under KVM and inspect the content of files
pages_sharingandpages_shared, for example:while [ 1 ]; do cat /sys/kernel/mm/ksm/pages_shared; sleep 1; done 13522 13523 13519 13518 13520 13520 13528
For more information on the meaning of the
/sys/kernel/mm/ksm/* files, see
/usr/src/linux/Documentation/vm/ksm.txt (package
kernel-source).